PHP Tutorial: WAMP Server Installation and configuration
- Prev
-
Topic List
Sec 1: Topics
Advance
Sect 3 : Quizzes
-
-
Discuss
-
Amit
How to Remove the Legend Colour Box in Chart JS
How to remove top legend/label color box in chartJS
-
Elango
What is the fixed GST rate for foods ?
Submit the list of food rates with GST
-
Elango
What is the fixed GST rate for foods ?
I need the GST related documents for searching the food rate after implementing GST. I am getting more friends in my college and business also. I have call all my friends for my home function. And all friends and my family members are go to restaurant for
-
Elango
I need great topic for me best essay services
-
Amit
Asdfa
-
Amit
How to send attachments with PHP Mail?
I need to send a pdf with mail, is it possible?
-
Amit
Enable & Disable a Div and its elements in Javascript
I am looking for a method to Enable and Disable the div id="dcalc" and Its children.
-
Amit
Json object
-
- Back To Tutorials
WAMP Server Installation and configuration
WAMP: Windows, Apache, MySQL and any one of PHP, Perl or Python.
WAMP is a set of free applications combined with Microsoft Windows, which are commonly used in Web server environments. The WAMP stick up the four key elements of a Web server environments ie an operating system, Web server, database and a web scripting language. In WAMP Windows is the operating system, Apache is the web server, MySQL is the database and PHP is a scripting language (or the alternative scripting languages like Python or Perl can be used instead of PHP). The equivalent version of WAMP package for macintosh operating system is called MAMP and for the Linux operating system it’s called LAMP.
For installing WAMP you have to fist download the WAMP installation file. You can download it from here.
Follow these steps to installing WAMP:
1. Double click on the downloaded (.ext file). It will show the screen

2. It will shows the version of your wamp server and also versions of included packages like(Apache, Mysql, PHP etc). Click on next to proceed.

3. Accept the agreement and click next.

4. Here you can select the directory (path) where you want to install the WAMP server. After inserting the correct path click on next.

5. Choose if you want to have icons added to your desktop and quick launch the click on next to proceed.

6. Click on install. After the installation is complete you will be able to see the files located at C:/wamp/ or your custom install directory, if you changed it from the default setting.
Starting Your WAMP Server for the first time:
In order to begin using the server we need to start it. Just like any program you can either use one of the icons you created during the installation process or look under Start->All Programs->WampServer folder and click on “startWampServer”
After starting your WAMP server an icon will appear in your task bar. You will see it in 1 of 3 states.
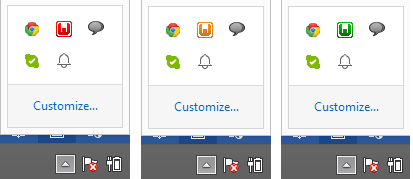
- Red, meaning no services on your WAMP server are currently running (when you first start the server it will be red, don’t panic, and let it boot up.
- Orange, meaning the WAMP server has been started, but not all of the services are running (again don’t panic, as the server starts it will transition from red to orange to green)
- Green, meaning the WAMP server has been started and all its services are running correctly
As the server starts up it will go from red to orange to green, it shouldn’t take more than a minute. If it seems stuck on either red or orange you may need to reboot the server, or “Restart all Services”.
NOTE: WAMP conflicts with the default Skype settings, so if you are signed into Skype, and then start your WAMP server you will see the orange WAMP icon, meaning that not all of the WAMP services are running. There are two easy ways around this. First, you can quit Skype, start your WAMP server and then sign into Skype after you have a green WAMP icon.
There is a better alternative; and that is to simply change your Skype settings. You need to be logged into your Skype account, then click on Tools->Options->Advanced->Connection and un-check “Use port 80 and 443 as alternatives for incoming connections”.
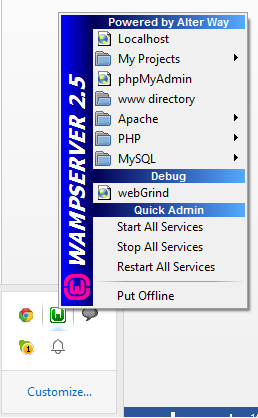
After you make the above changes to solve the Skype issue, or you’re not seeing an orange or red WAMP icon you can restart the server from the icon tray.
Testing WAMP Installation:
When the WAMP icon goes “Green” you can visit the url http://localhost and you should see the following

It means you have successfully installed your WAMP server, now you can run your PHP script.
You can now add html files, php files, xml files, directories, etc to your www folder and they will be visible from your browser via http://localhost/yourdirectory,
PHP Hello world Example:
You can use notepad or any other IED for writing your PHP code.
Open your notepad and write the following line of PHP Script:
echo 'Hello world';
?>
Save this file as ‘test.php’ in c:\wamp\www\ (or whichever directory you installed WAMP ).
Type the url “localhost/test.php” in your browser. You should see the “Hello World” message:
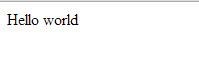
Congratulation, you have successfully installed the WAMP server. Enjoy programming.
Next Topic